Building a secure and strong base is what everyone looks for in 7 Days to Die. When you are preparing the foundation of your base, you can sometimes notice the holes in the ground. These holes stop you from placing the foundation until you have filled in the holes.
So, that’s what we are going to cover in our today’s guide. We have two different ways of filling in the holes and patches on the ground. The two ways are using Sod or using the dirt.
Now, both of these ways are different from each other and include filling the holes in different ways. We are going to cover both of these ways in detail so that you can easily learn to fill those patches. So, let’s get started.
Table of Contents
How to Fill in Holes in 7 Days to Die
When you are building your base there could be one thing that can interrupt the process and that is the hole. If you are facing this issue then you are going to find out its solution right now in this guide.
The base is the main place that shelters you and keeps you safe from the hordes of zombies at night and during the daytime as well. You can even store almost everything in your base including the weapons and vehicles.
Holes are a pretty annoying thing in 7 Days to Die. They can interrupt the whole process of building your base as you cannot place the block in that hole. First of all, you have to fill in that place to make the ground even and then you can place the foundation of your base.
So, to fill in the holes, we have two things that we can do.
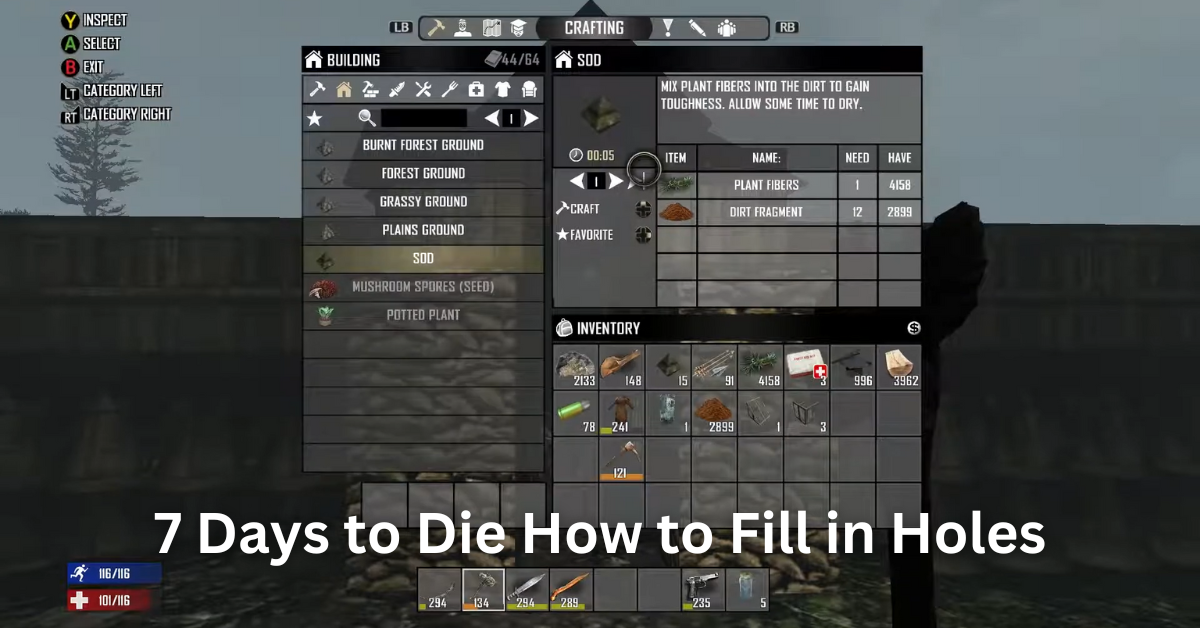
The first thing is you can craft the Sod which is a pretty basic item. The Sod is a building material that is quite similar to dirt but is more durable. That is why this is the best option to fill in the holes. Here’s what you will need to craft Sod.
- 1x Plant Fibers
- 8x Dirt Fragment
These ingredients are going to give you 1x Sod that you can use to fill in the holes.
The next thing you can do is use the dirt. Just harvest the dirt from anywhere and place it in your inventory. Then head to the spot where you want to fill in the holes. Now, open your inventory and go to the crafting menu.
In this menu, look for the Ground and then craft the shape of dirt that you need. Once it is crafted, you can place it in the hole. You have to first give the dirt the required shape only then you can place it in the hole.
Can You Fill in the Holes in 7 Days to Die?
Yes, the holes in 7 Days to Die can be filled in. You may have seen the holes in the ground which are pretty annoying. Especially, when you are placing the foundation for your base. The holes need to be filled in first to place the foundation.
So, you can easily fill in the holes using the Sod or Dirt. Sod needs to be crafted using Fiber and Dirt Fragment but is more durable as compared to the Dirt. The Dirt can also fill in the patches and holes in the ground but first, you need to give it a shape in the crafting menu.
What is Sod Used For in 7 Days to Die?
Sod is a building material which is mainly used for filling the holes and patches in the ground. You can craft it in the crafting menu using the Fiber and Dirt Fragment. This is the best option out there to fill in all the holes in the ground.
How do I Repair Things in 7 Days to Die?
Most of the items in 7 Days to Die including tools, weapons, and vehicles can be repaired by using the Repair Kit. Each item requires 1x Repair Kit to regain its full durability. You can craft a Repair Kit using Forged Iron and Duct Tape.
There you have everything regarding 7 Days to Die How to Fill in the Holes guide. So, two ways can be used to fill in the holes. The first one includes the use of Sod which is a craftable item and the second method includes the use of dirt which first needs to be shaped to use.
Hopefully, you have found this guide helpful. Stay connected with us to get updates on games and for more exciting guides.


