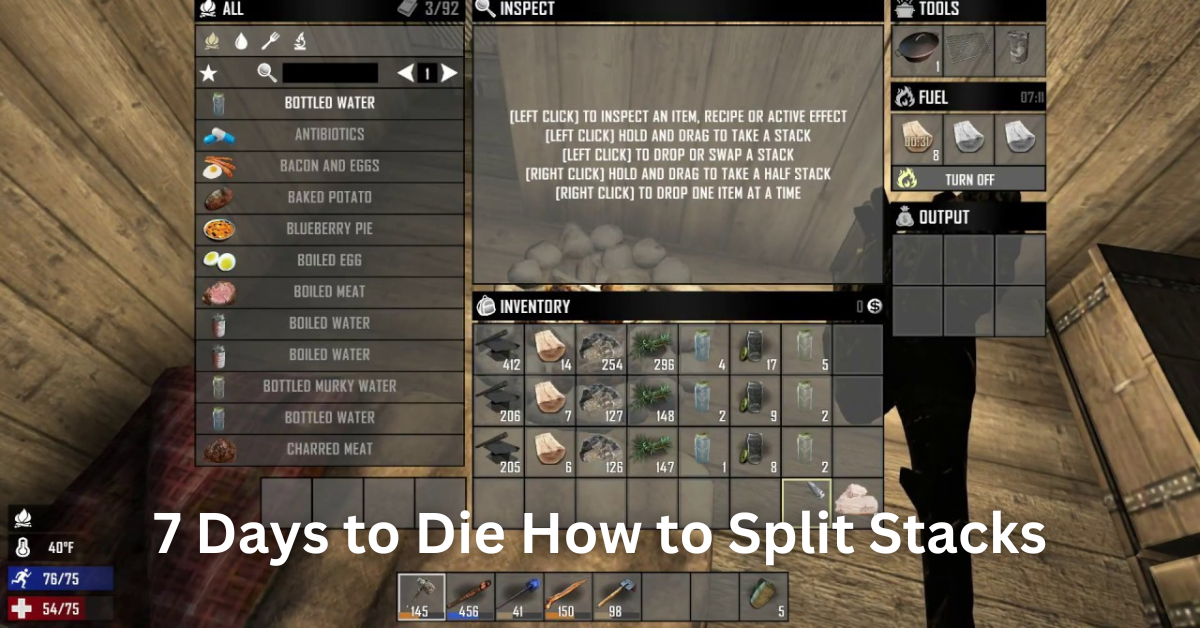
There is just one way to split stacks in 7 Days to Die. It’s not a difficult thing to do. Rather it’s just a simple drag-and-drop thing. You just need to hold the stack with your cursor move it to another slot or any other and simply drop it.
This will give you a half-split stack. You can also drop a single item from the stack if you click the right mouse button again. Splitting stacks can be helpful when you want to transfer some of the items to any other storage.
Most of the time when you gather items through different activities they get stacked in the same inventory slot. So, you can always split that stack with the method we mentioned. This guide covers the stack-splitting technique in detail.
Table of Contents
Splitting Stacks in 7 Days to Die
The stacks of items in your inventory can be split with a simple method. All you need to do is right-click and hold the tack with your cursor, it will give you half of the stack. You can then drop this half stack into another slot or you can also move it to any other storage.
You can also drop a single item from this stack while holding the stack and clicking the right button again. Each time you click the right button it will drop a single item from the stack.
It’s that easy to split stacks in 7 Days to Die. Spitting stacks is a convenient thing to do when you are planning to move half or more of your items from the same category to any other storage or the crafting menu.
Splitting Stacks on Consoles
Now, if you are playing 7 Days to Die on your console then the splitting method will be the same as the one on PC. But we don’t have the mouse buttons on consoles. So, what we are gonna do is press the X button if you are on XBOX or press the square button if you are on PlayStation.
The only difference is the button. We are not gonna use the right mouse click on consoles. But instead the X button on XBOX and the Square button on PlayStation.
Items in 7 Days to Die

There are almost 500 different items in 7 Days to Die. This includes items from all the categories such as weapons, tools, food, resources, structures, vehicles, electrical components, and others.
Some items are obtained through the crafting process while others can be looted. You can also purchase various items from the traders as well.
7 Days to Die has various categories of items. Each category or group has dozens of items. Some of these items are useful while others are for decorative purposes as well.
Here are the categories of items.
- Ammo/Weapons
- Science
- Decor/Miscellaneous
- Resources
- Traps
- Food
- Medical Supply
- Consumable
- Building Material
- Apparel
- Device
- Vehicle
- Gear
- Armor
- Fuel
- Component
- Recipe Book
- Furniture
- Repair Item
These are all of the groups of items that you will see in the game.
How do You Split Stacks in 7 Days to Die?
The stacks are quite easy to split in 7 Days to Die. This can be done simply by right-clicking any stack and dragging it to the slot or inventory you wish to place. This will give you half of the stack. You can also press the right button again while holding the stack to drop a single item.
The stack will drop a single item each time you click the right mouse button. This does apply to stacks that have items over 2.
Are Stacks of Any Use in 7 Days to Die?
Stacks in your inventory are extremely helpful when you want to store more items. You can stack up similar items to free up extra slots that can be used for other items.
You can free up any storage or inventory by stacking up similar items. This gives you a lot of extra space. However, there is a stacking limit for each category of items. This limit is different for each category.
That’s everything for the 7 Days to Die How to Split Stacks guide. The stacks can be split into half by right-clicking and dragging them to any other inventory or slot. You can again click the right button while holding down the stack to drop a single item.
This can be repeated until the stack is left with a single item. It’s that easy to split stacks in 7 Days to Die.
Hopefully, this guide has helped you in splitting stacks. Stay connected with us for more exciting and informative guides.


