
Revelation is the real last mission of Starfield’s main story. This mission concludes all your previous choices, especially the ones made during the Unearthed Quest. You will automatically unlock this quest after acquiring all the remaining artifacts from the wastelands. There is an epilogue attached to this mission, but it doesn’t really count as a real quest, as it will just start your NG+ playthrough.
For the most part, the Revelation Quest plays out pretty straightforwardly, with no puzzles to solve and no alternate paths to get lost. However, the enemies that you and your allies face for this final showdown mainly depend on your previous choices. Furthermore, you will need plenty of help to progress through the six major battles. So, going to the buried temple site blindly will get the best of you. Therefore, this Revelation walkthrough will guide you through your every step to become a true Starborn.
Table of Contents
Starfield: Revelation Walkthrough
You will receive the Revelation Quest after obtaining all of the remaining artifacts. The final step before you can unlock the Unity is to acquire the last few pieces; sounds simple, right? Well, the only problem is that these pieces have already been acquired by the two Starborns, i.e., Hunter and Emissary. So, it is your job to collect all the pieces either by killing your foe(s) or persuading them.
However, before you can reach the final showdown, there are a couple of other Starborns that need your immediate attention. Here is a complete Revelation walkthrough to make things clearer:
Go to Masada III:
The first step in your hour-long journey is to head to the buried temple on Masada III. This planet is located in the eastern corner of your Starmap (galaxy view). So, depending on your current location and explored universe, you can reach this system in a single or multiple jumps. However, it would be best to take your best ship, install the latest ship weapons, and take a few repairing components before you enter orbit as a massive dogfight awaits you.

As soon as you enter Masada III’s orbit, you will receive an incoming transmission from a bunch of hostile ships. No matter which option you choose, you will end up starting a massive ship battle right away. The good news is that the person you sided with during the Unearthed Quest will help you take down these ships. Here are the possible outcomes of your Hunter, Emissary, or neither choice:
- Side with Emissary: Hunter, along with a group of hostile ships, will attack you in his huge Helix. However, Emissary and the Scorpius will be your allies for this battle.
- Side with Hunter: If you side with the Hunter, he will support you in defeating the Scorpius and the rest of its fleet.
- Side with Neither: You must fight and defeat both the Scorpius and the Helix, along with several hostile ships on your own.
In any case, the best strategy is to try to destroy the smaller ships while dodging the incoming projectiles from the Starborn ships. The enemy(s) will flee from the scene after you destroy the smaller fleet or significantly damage the main starship(s).
Explore the Buried Temple:

After defeating the fleet, scan Masada III from orbit and land near the buried temple site. As soon as you exit your ship, you will be greeted by your ally Starborn (Hunter or Emissary). The ally will give you a heads-up on the situation and a little background about what makes this site so special. So, just try to exhaust all available dialogue options to unlock the latest quest marker.
As you progress along the path, Hunter will point to a bunch of dead Ecliptic mercenaries and how choosing them for the defense was very creative. You must use this opportunity to loot every dead soldier and look for supplies, including Medipacks, First Aid kits, and ammo (lots of it). At the end of the path, you will enter an open yard with steel stairs and projectiles coming your way from all directions.
Defeat Starborn Musa:

As you progress to the loading docks, you will see several duplicates of Starborn Musa charging your way. This power is very common among Starborns, so you won’t be surprised to see it as your first challenge.
The easiest way to pass through this stage is to keep moving and avoid the charging enemies. Also, these clones and Musa himself will use grenades and a few light weapons, so a shotgun will get the job done. Once you eliminate Musa, the quest marker will update to a new site, leading you directly to the second Starborn.
Defeat Starborn Athallah:

The next stop is the construction site inside the buried temple. You can access this location by going through the tunnel; just follow the blue marker. As soon as you reach the site, a bunch of Ecliptic Mercs will revive from corpses and start attacking you on sight. This is the second Starborn Power used by the infamous Starborn Guardian Athallah.
The good news is that your ally Starborn and accompanying companion can take care of these zombies. So, focus your fire attention on the Guardian while ignoring all the reanimated corpses. These zombies will die as soon as you kill the main Starborn. Again, a close-range weapon, preferably a shotgun, will get the job done for you. Once you defeat the Guardian, you will receive the Ecliptic Base ID Card (keep it safe).
Find the Anomaly:

After defeating the second Guardian, your quest marker will update to find the anomaly. Simply follow the marker to the locked door and use your Base ID Card to unlock it. Once you exit on the other side, you will find yourself in some sort of an office building. Keep a look out for Digipicks and other important items, mostly lying around on tables. Finally, make your way to the lower floors until you find a distortion, and walk in it to proceed.
The distortion leads you to the First Steps mission, where you are searching for the first artifact with Heller. Instead of going for the artifact, follow the tunnel system and step into the second distortion to return to Mosada III. This time, you will enter a large hall with a bunch of turrets, robots, and two Starborn Guardians, Teutra and Rinn.
Defeat Teutra and Rinn:

Teutra and Rinn combine their powers to activate turrets and robots. These machines will start attacking you on sight, so be prepared. The good news is that you can easily turn the tide of the battle by disabling the security. The computer room is located in the back of the large hall. To enter this room, you can use your Expert Lockpicking Skills and the Digipicks that you found earlier.
Alternatively, if you don’t have any Security skills, you can acquire the keycard by defeating Guardian Teutra. In any case, enter the computer room and disable the security by changing the friend/foe setting so that the turrets start shooting at the enemies. Much like your previous experience, the robots will stop shooting after you kill both Teutra and Rinn.
The Second Anomaly:

After defeating the two Starborn Guardians, you will enter a large security room with a bunch of computers. You will find yet another yellow-locked door on the other side of the room. You can open this door by using the second Ecliptic Base Keycard that you acquired from Guardian Rinn.
Once you open the door, you will find another distortion; step into it to proceed. This distortion takes you all the way back to your encounter with Captain Petrov. After a short dialogue, the captain, along with his goons, will start shooting at you. Here, your choices don’t really matter, so just exhaust the whole conversation. After you defeat the captain and his folks, you will receive the Private Quarters Key. Use this key to open the door behind the captain’s couch and step into the second distortion to return to the buried temple.
Defeat Starborn Fionn:

After you return to reality, your allies will mock you for letting the temple get to you; ignore them. Next, follow the blue marker to the elevator and ride it to the main buried temple site. However, as you are traveling down the shaft, you will enter yet another distortion. This time, you will see yourself lying dead on the floor. Don’t worry it’s just a parallel universe. After Vladimir finishes his dialogue (avoid attacking him), explain to him the concept of the multiverse.
Next, turn around 180 degrees and enter the second distortion right behind you to return to the buried temple. Once you reach the depths of the buried temple, you will find Starborn Guardian Fionn. However, before you reach this point, equip your least powerful weapon, as the Guardian will replicate your inventory. For some reason, the duplicates will wield the same weapons as yours, so using a weaker weapon will get you through this section.
Revelation: Defeat Starborn Hunter or Emissary

The whole Starfield journey has led you to this point where you are just one step away from unlocking the Unity. All that stands between you and your objective is either Hunter, Emissary or even both (depending on your choice). In any case, restocking your supplies from the blanket in front of the elevator and saving the game before entering the buried temple is the best approach.
Also, if you have any unused skill points, investing them in persuasion would be best, and using items like Hippolyta will increase your chances. Once you enter the buried temple, you will meet the final boss of your ending. Here, you have three dialogue options, i.e., 2 attacks and 1 persuasion. If you pass the persuasion check (legends), the Starborn(s) will gladly hand over the artifacts and be on their way.
However, if you choose any of the two options or fail the persuasion check, the Starborn enemy will start attacking. During the fight, the enemy will open multiple portals to other locations and even call other Starborns and duplicates for their help. The best way to defeat these enemies is to keep moving and use your best Starborn powers along with a handy weapon.
Revelation: The Final Artifact

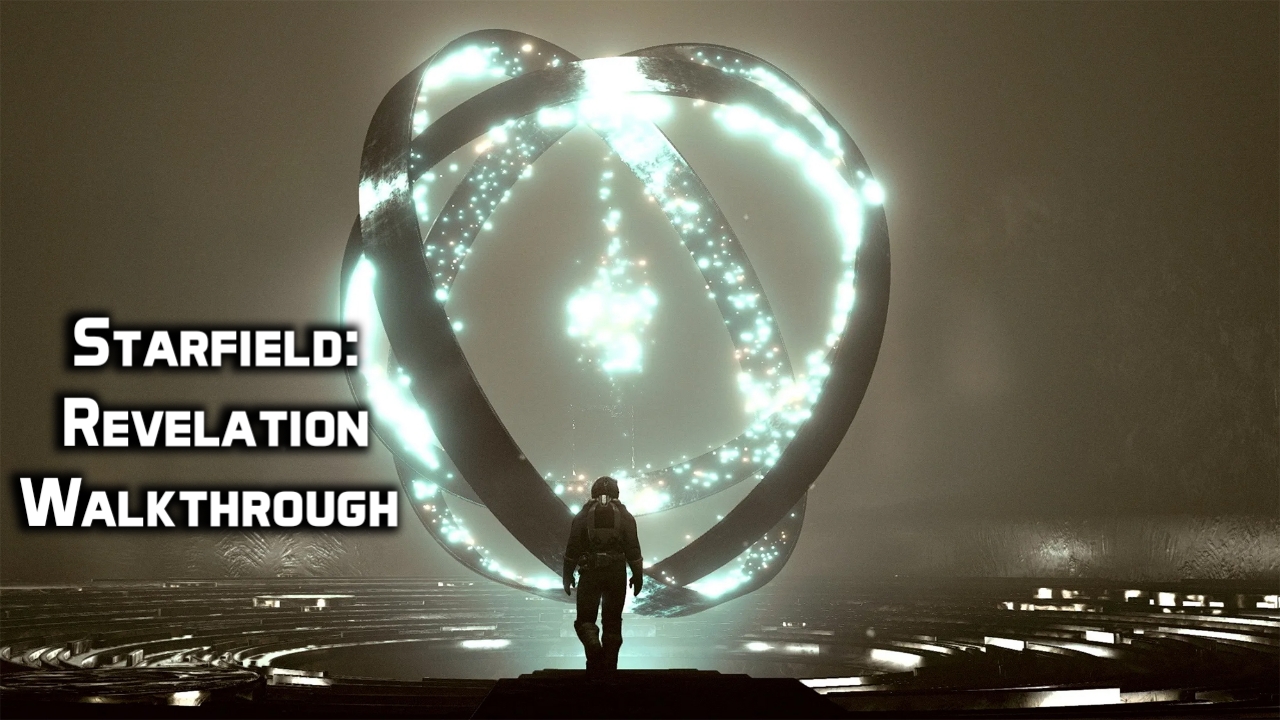
Once you defeat the Starborn enemy(s), you can acquire the remaining artifacts from his body. Meanwhile, your allied Starborn (if any) will gladly hand you over his artifacts. Finally, after speaking with your ally and gathering all the loot, you can now enter the rotating rings to acquire the final Starborn artifact, Mu.
After acquiring the final artifact, you will return to the ground and then to your awaiting starship. The final quest marker will ask you to each Cydonia, where you must complete your anomaly, unlock the Unity, and make the One Giant Leap. After your progression, the credits will roll, and you will be reborn as a Starborn during the NG+ mode.
Revelation Rewards:
Unlike other Starfield quests like Entangled, you don’t get any direct rewards apart from a massive XP boost. However, you can get some of the best weapons and items by looting the corpses and Starborn Guardians. Here is a complete list of possible rewards that you can get by completing the Revelation Quest:
- 5,000 XP
- Eternity’s Gate for killing the Emissary
- Unmitigated Violence for killing the Hunter.
- Artifact Mu (visit Vlad before the jump)
- Over 50,000 Credits (loot)
- UC Naval Cutlass
- Calibrated Deepcore Spacesuit (crate)
Conclusion:
Starfield comes to an end once you collect all the artifacts and assemble them to unlock the Unity. However, before you can make the Giant Leap, you must face the final boss during the Revelation Quest and pick the artifact Mu. While most of the quest is pretty straightforward, you will have a hard time fighting against the 6 Starborn Guardians. Therefore, this article provides a complete Revelation walkthrough to help you conquer the buried temple.


